miércoles, 14 de abril de 2010

Output Jack Fix

Corina Electro-Acoustic Guitar of Korean manufacturing. According to the owner it must have al least 14 years of use.


This is how it looked when it got in to my studio.
The guitar has a blow in the bottom left side that needs urgent attention but the owner doesn't care much about it because he consider it an aesthetic issue.


This is the manufacturers factory seal.


Here you can see the broken and retracted wood inside the guitar. The constant use of the cable connector in addition to the casual cable pulls looses the jack nut and produces pressure that weaken and break the wood.


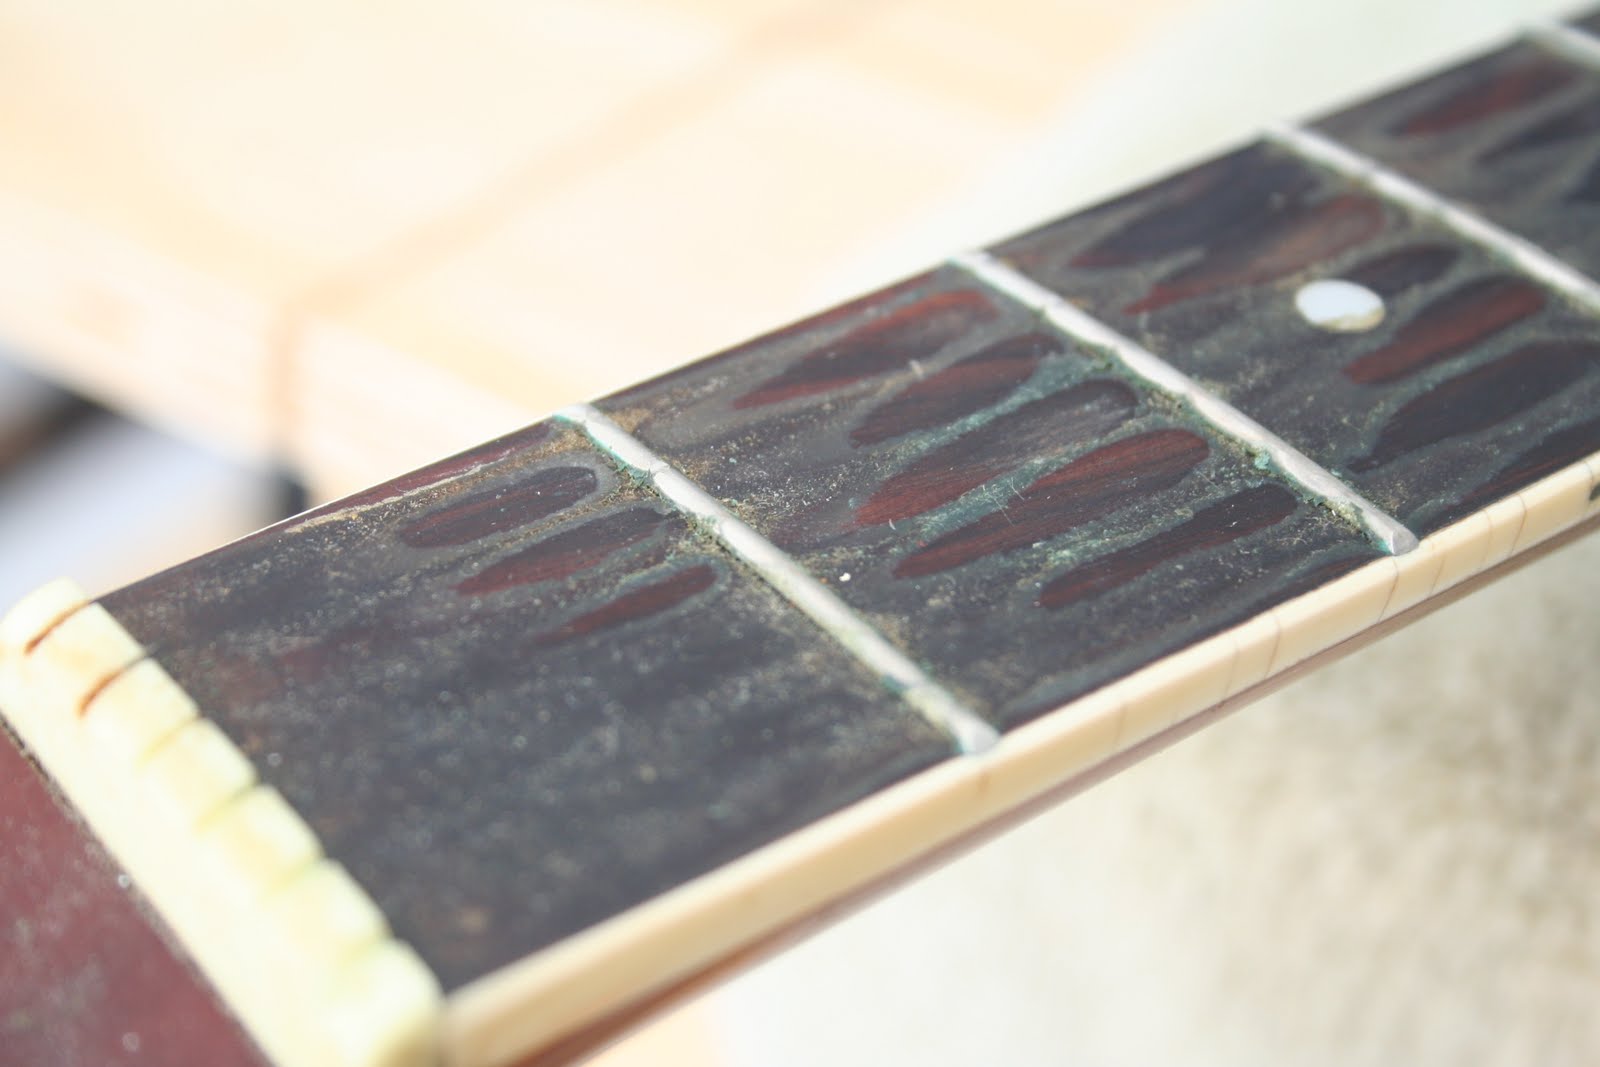
In the three previous photos you can see grease from the hands, dust and dirt accumulated over the years.


Wood Repair.


First, the area to be worked must be masked with tape, then the wood is pressed from the inside to the outside of the instrument to set the loose pieces of wood with cyanoacrylate glue. After these pieces are in place several layers of cyanoacrylate glue are added to create volume until it reaches the same level of varnish.
Next Step is to reinforced the area with a thin layer of wood to compensate for the structural weakness of the hole and then drill the hole again.
The exterior is sanded to a smooth shiny surface equal to the original.


Here you can see the final result. The light colored areas are those that were reconstituted. Their varnish was lost.


To make sure that the break will not happen in the same way again, I installed a stainless steel washer wider than the factory spec and inside a lock washer.


Here you can see the stereo jack connector. The lock washer was installed inside and the smooth stainless steel washer was installed on the outside along with the nut that was used for final installation.


These are the left over pieces, a nut and the two original washers .


In the two photos above you can see the fingerboard clean with shiny frets. The frets were hand polished.


Finally I remove all the old grease giving the guitar its natural luster. This is how it looked at the end.

Perhaps on a next time the owner will give his guitar a second chance and bring it back to my workshop to correct the blow on the left side of the top.

The End

Arreglo de Conector de Salida

Guitara Electro-Acústica Corina, de fabricación Koreana. Según el dueño debe tener algunos 14 años de uso.


Asi llego a mi taller.
La guitarra tiene un golpe en la parte inferior izquierda que necesita atención urgente pero el dueño no le preocupa por considerar el golpe uno estético.


Este es el sello del fabricante.


Aqui se ve la madera rota retraida hacia el interior de la guitarra. El constante poner y quitar el cable conector, además de los casuales tirones del cable produce presión a la madera que la debilitan y rompe.


En las tres fotos anteriores se ve la grasa y el sucio acumulado por los años.


Reparación de la madera.


Primero se enmascara el area a trabajar, se presiona la madera desde el interior hacia el exterior del instrumento y se fijan los pedazos de madera suelta con pegamento de cianocrilato. Después que estos pedazos esten en su lugar se colocan varias capas de pegamento de cianocrilato para crear volúmen hasta llegar al mismo nivel del varniz.
Paso seguido se refuerza el interior con una delgada capa de madera para compensar por la debilidad estructural del agujero y se barrena el agujero nuevamente.
Se lija el exterior hasta lograr una superficie lisa y brillante igual a la original.


Aqui se puede ver el resultado final. Las areas de color claro son las que se reconstituyeron. El varniz de las mismas se perdio.


Para asegurarme que la rotura no se repetirá de igual forma, le puse al conector una arandela de stainless steel mas ancha que la que trae de fabrica y en el interior una arandela de seguridad.


Aqui se puede ver el conector stereo, la arandela dentada que se instaló en el interior y la arandela lisa de stainless steel que se instaló en el exterior junto con la tuerca que se usó para la instalación final..


Estas son las piezas que nos sobran, una tuerca y las dos arandelas originales.


En las dos fotos anteriores se puede ver el diapasón limpio y los trastes con brillo. Los trastes fueron pulidos a mano.


Al final le saque toda la grasa vieja y le devolví su lustre natural. Asi quedo finalmente la guitarra.

Tal vez en una proxima ocasión el dueño se anime y traiga su guitarra nuevamente para correjir el golpe de la tapa.

Fin.

jueves, 25 de marzo de 2010

Cello Neck Repain Part 5: Fingerboard Clean Up and Repair


Cleaning the Hide Glue Residue.


I soften the glue with a cloth soaked in hot water. Then I scrape it off with the Stainless Steel ruler.


This is the color and grain of the wood. The traditional black color of ebony is due to a dye that is used to give uniformity to it. Ebony usually has streaks ranging from light to dark brown to almost black.


Here you can see the cleaned fingerboard.


Problems in the Road

The alcohol used for the fingerboard removal took off some of the ebony dye revealing the natural color of the wood. After removing the glue I decided to clean off all the dye and redo the entire fingerboard correcting the problem.
While I was removing the dye with alcohol, I noticed a crack on the surface at the bottom end of the fingerboard. I rubbed it quite hard with the cloth trying to get the tint of the crack, to my surprise two small pieces of wood fell off the fingerboard.


In this picture you can see the length of the crack that runs from the arrow A to arrow B. When I looked closely, I noticed that the pieces had been previously glued with Hide Glue. The residue of the glue can be seen in arrow C.


The affected area must be completely removed and cleaned prior to be re glued. With the heating pad I warmed the area and with a hook type tool pull off the parts.


Solution to the problem, aggressive version


I faced the dilemma of the permanent and appropriate correction for the fingerboard. Apparently the luthier that made the previous fix to this Cello glued the parts with Hide Glue and covered the crack with wood filler. Then he applied layers of black dye to cover the fix.
If I do the same as the previous luthier, most likely in a few years the crack will reappear and the pieces can detach. So I decided to do something that is not necessarily in the books. Remove all the old tint leaving the fingerboard in the raw and cover the whole surface of the fingerboard with two generous coats of epoxy resin. The most obvious question: Why do this? The answer to the question is explained with the procedure for removal of old dye.

Old Dye Removal


With lacquer thinner and an abrasive black sponge I removed the dye from the fingerboard.


After scraping the surface I noticed that the fingerboard had several layers of varnish and dye in the corners. The varnish is the same that was used for the Cello neck. Apparently both parts (fingerboard and neck) were varnished together to give the instrument more integrity.
In the arrow A you can see the black dye still to be removed. In the arrow B a surface layer of varnish, In C another deeper layer and finally the raw wood on arrow D.


In the two previous photos the fingerboard can be seen clean, free from dye and varnish.
The natural chocolaty color of the fingerboard can be seen on the cloths I used for the work. These cloths answer the obvious. Part of the wood was worn with the abrasive sponge.
Coating the fingerboard with resin can return it to the original dimensions and at the same time it will give me some extra material for sanding the surface to its original radius.

Gluing the Loose Fragments


I rubbed the area to be glued with alcohol to remove any trace of Hide Glue.


Here you can see the parts to be glued clean and free of Hide Glue.


The whole area is covered with tape to avoid the resin to fall in the raw wood.


Here are the parts ready to be glue.

The parts must be clamped for 12 hours.

In the two photos above you can see the pieces glued in place. Despite the crack that is visible now it will disappear when everything gets coated in epoxy resin .

Now we just need to rectify the fingerboard and cover it in resin, then re glue it to the Cello's neck.

End of Part 5


Brazo Roto de Cello Parte 5: Diapasón, Limpieza y Reparación


Limpiando los residuos de pega.


Con un paño y agua caliente ablande la pega y la removí raspándola con la regla de Acero Inoxidable.

Este es el color y fibra de la madera. El tradicional color negro del ébano se debe a un tinte que se utiliza para darle uniformidad a la madera. Usualmente el ébano tiene vetas que van de color marrón claro a marrón oscuro casi negro.


Aquí se puede ver el diapasón limpio.


Problemas en el Camino

El alcohol que utilicé para la remoción del diapasón hizo que el tinte se mareara dejando ver el color natural de la madera. Luego de quitar la pega del diapasón decidí despintarlo completo para volver a entintarlo y corregir el problema.
Cuando estaba despintando el diapasón con alcohol noté una grieta en la superficie inferior al final del diapasón. Froté fuertemente con el paño empapado en alcohol para tratar de sacar el tinte de la grieta y para mi sorpresa dos pedazos de madera se desprendieron del diapasón.


En esta foto se puede ver la longitud de la grieta que va desde la flecha A hasta la flecha B. Cuando miré de cerca la situación, noté que los pedazos habían sido pegados con cola animal (Hide Glue). En la flecha C se puede notar el residuo de la pega.


Para poder volver a pegar las partes hay que despegar completamente el área afectada. Con la almohadilla de calor calenté el área y con una herramienta de gancho levanté los pedazos sueltos.


Solución al problema versión agresiva


Me encontré con el dilema de hacer la corrección permanente y más adecuada para el diapasón. Aparentemente el luthier que arreglo el diapasón de este Cello luego de pegar las partes con cola animal, enmasillo la grieta y puso varias capas de tinte negro para cubrir el arreglo.
Si hago lo mismo que el luthier anterior, muy probablemente en unos años la grieta se va a volver notar y los pedazos se pueden desprender. Por eso decidí hacer algo que no necesariamente esta en los libros, recubrir todo el diapasón con dos generosas capas de resina de epoxi. La pregunta mas obvia seria: Por que hacer esto? La respuesta se contesta con el procedimiento de remoción del tinte viejo.

Remoción de tinte viejo


Con adelgazador de lacas y una esponja abrasiva negra removí el tinte del diapasón.


Luego de raspar la superficie noté que en las esquinas del diapasón había varias capas de barniz y tinte. El barniz es del mismo que se uso para el brazo. Aparentemente pintaron ambas partes del instrumento juntas para darle integridad.
En la flecha A se puede ver el color negro del tinte sin remover. En la flecha B una capa superficial de barniz, en la C otra capa más profunda y finalmente la madera cruda en la flecha D.


En las dos fotos anteriores se puede ver el diapasón libre de tinte y barniz.
El color natural chocolatoso del diapasón se puede ver en los paños que utilice para el trabajo. Estos paños contestan lo obvio. Parte de la madera fue desgastada con la esponja abrasiva. Recubriendo el brazo de resina se le puede devolver las dimensiones originales al brazo, lijando el radio nuevamente.

Pegando los fragmentos sueltos


Con alcohol se frota fuertemente el área a ser pegada para remover todo residuo de la cola animal.

Aquí se pueden ver las partes a ser pegadas ya limpias, libres de cola animal.


Toda el área en donde no queremos que caiga resina es cubierta con cinta adhesiva.


Aquí se ven las partes listas para pegarse.

Se prensan las piezas por 12 horas.

En las dos fotos anteriores se puede ver las piezas pegadas en su lugar. La grieta a pesar de que es visible ahora, cuando se recubra todo en resina de epoxi va a desaparecer.

Ahora solo falta rectificar el diapasón cubrirlo en resina y volver a encolarlo al brazo del Cello.

Fin de la parte 5